How To Make a Gravity Bong

How To Make a Gravity Bong - In 5 Easy Steps

What is a Gravity Bong?
Gravity bongs, often called geebie, GB, or geeb are creative and unique bongs that use air pressure and water along with gravity to create large plumes of smoke that can be easily inhaled.
They are usually made of water bottles and buckets, which is why some are known as bucket bongs.
Gravity Bongs are a fun and easy take on the classic smoking style.
Whether you prefer smoking bongs, hand pipes, blunts, or vapes, making a gravity bong is a fun way to combine some creative crafts and potent hits. Gravity bongs can be put together from a few everyday household items, like empty soda bottles and buckets.
But in modern times, we have seen some modern takes and upgrades that mimic the classic homemade gravity bong. But one of the best things about making your own is that immense feeling of accomplishment after you make something fully functional and can use it successfully when completed!
Tools Required to Making a Gravity Bong
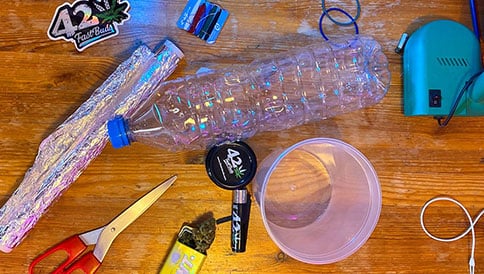
The basic gravity bong is ordinarily made from two plastic bottles, a bowl, and some water. Here are some essentials to make a basic homemade gravity bong:
· 1-gallon water bottle
· A 2-liter soda bottle
· Scissors
· A sharp object like a knife or box cutter
· Water
· A bong bowl
Most of these items can be easily replaced if you don't have the exact bottle, and it's not a very strict formula for the size and measurements of these items. One of the enjoyable aspects of this experiment is the creativeness when selecting the parts, especially if it's a temporary replacement or a last resort for a late-night accidental fix. So without further ado, it's time to get your MacGyver on.

How to make Gravity Bong
Learning how to make a gravity bong is easy if you follow our simple beginner-friendly steps.
There are many benefits to making your gravity bong, such as customizing your piece's size and even style if you are creative. Gravity bongs are the perfect smoking option for those looking for a potent hit with each inhale
Step 1: Make the Base
First, the bottles need to be empty and clean. The larger, 1-gallon bottle will be used as the base, so the top third will need to be completely cut off.
Just the bottom two-thirds of the bottle will remain after the cutting is done, making sure it's shorter than the soda bottle at the cut. The top of the bottle can be thrown away. If there are any sharp plastic parts after cutting the bottle, trim them away or use some duct tape to cover the sharp edges.
Step 2: Make the Chamber
For the smaller bottle, in this case, the 2-litter soda bottle, you basically need to cut off the base of the bottle. So the bottom third of the soda bottle should be cut off and thrown away. What's left is the top of the soda bottle with the lid. Make sure it's higher than the 1-gallon base bottle.
Step 3: Make the Bowl Piece
In my university days, we would be creative and use tinfoil or find other ways to make the flower bowl. While it's creative and fun to do occasionally, we recommend using a glass herb bowl and drilling a small hole in the soda cap that it can easily slot into.
If you don't have a drill, then another way to do this is to carefully take a knife and make a hole in the top of the soda bottle cap. The bowl piece should fit tightly to the bottle cap, so carefully pierce it deeper and broader into the bottle cap until the puncture holes fit the bowl piece tightly. It takes patience, but the better the cut here, the better the bowl will work.
Step 4: How to Set It Up
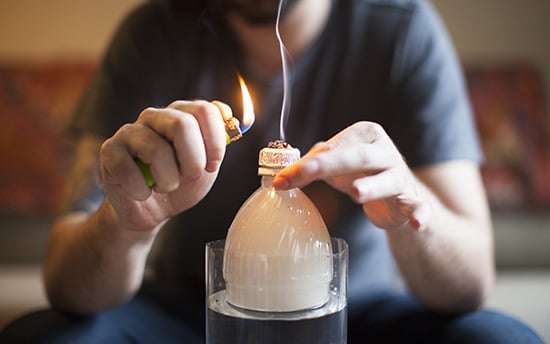
Your homemade gravity bong is almost complete; Just add water to the base, which should be the larger water bottle. Fill the base about two-thirds full of water, but be sure to test it to make sure it's at your preferred tension level. Place the soda bottle (with its bottom cut off) in the base. The top of a soda bottle with a flower bowl should be above the water level. The lid is screwed on (but not too tight), and the bowl is inserted into the lid.
Step 5: How to Use It
Once set up, simply pack and then light the bowl. The soda bottle will start to fill with smoke. As it becomes fuller, lift the soda bottle up, which draws on the burning herb and increases the smoke in the soda bottle.
The lower lip of the soda bottle should remain below the water level trapping all that lovely smoke in the bottle.
Once the soda bottle is filled with smoke, unscrew the cap with the flower bowl in it. You may want to quickly cover the opening with your hand so that too much smoke does not escape as you set the cap to one side.
Then remove your hand and place your mouth around the top of the soda bottle. Carefully push the soda bottle down inside the 1-gallon base bottle and inhale. As you lower the soda bottle, the water will force the smoke out, making it easy to inhale. Don't worry if you can't inhale all the smoke in one go; gravity bongs are great for sharing.
Conclusion
Gravity bongs are fun to make and ultimately pay off handsomely, making them a great activity for those lazy Sundays or partying. They may need some trial and error to get the water level right at first, but it's a classic choice when there's nothing else to use.
What's the most innovative thing you have done for smoking weed? Whether it's crazy joints or other homemade creations such as the apple bong or watermelon bong, smoking has a way of bringing out our creative side.


