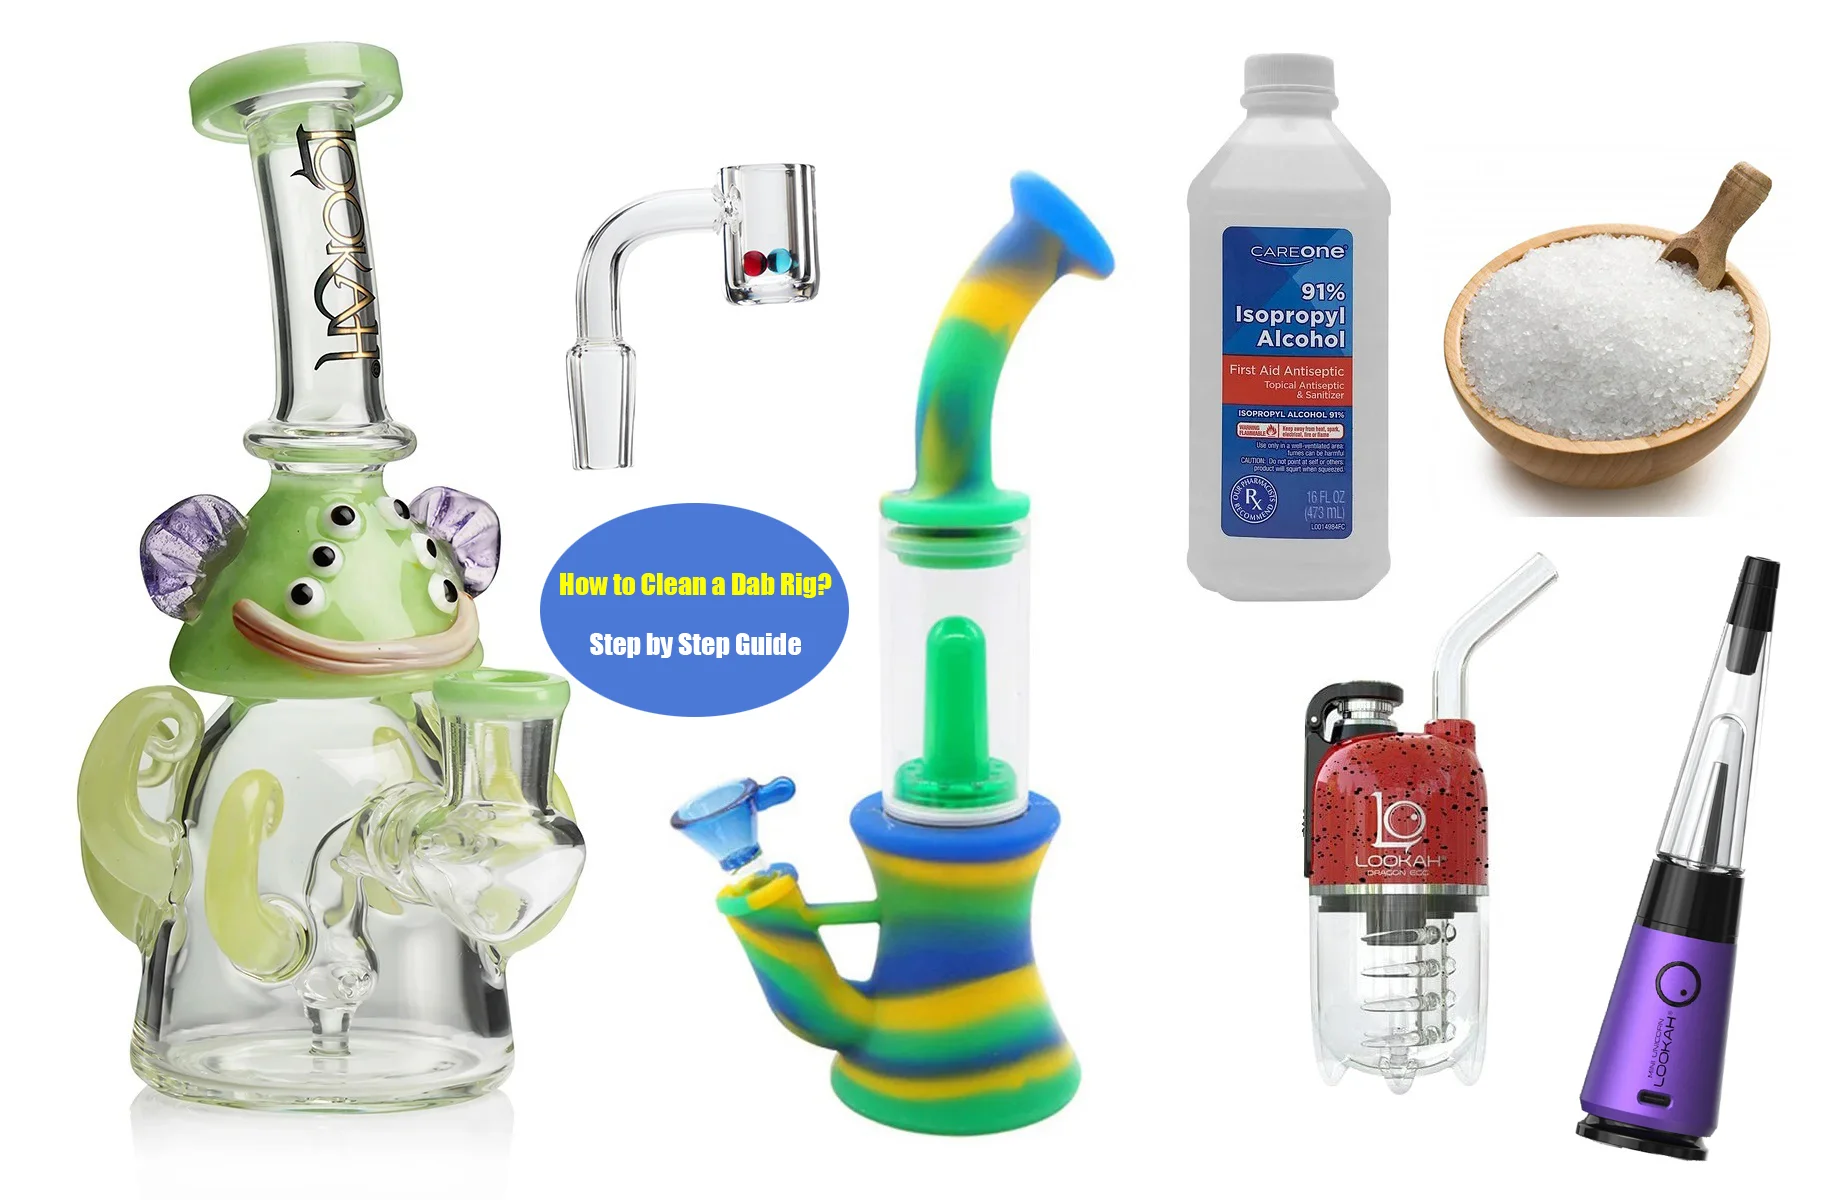
How to Clean a Dab Rig? Step by Step Guide
Dab rigs are a popular choice for cannabis enthusiasts who enjoy consuming concentrates, offering a potent and flavorful experience.
However, to ensure your dab rig continues to deliver the best possible performance and maintains the fresh flavors of your dabs, regular cleaning is essential.
Residue, oils, and impurities can accumulate over time, affecting both flavor and performance. If left unkempt, the stagnant water can start growing dangerous things like mildew that you don't want to inhale.
Regular cleaning maintains the fresh flavors of your dabs, ensures smooth hits, and keeps your equipment looking as good as new.
So, how exactly do you clean a dab rig? If you are new to the area of dab rig, you maybe don't know and curious about how to clean your dab rig.
In this guide, we'll delve into the process of cleaning a dab rig, including glass, silicone and even electric types, to keep your favorite rigs shiny, and enjoy the purest and most flavorful dabs.
What is a dab rig?
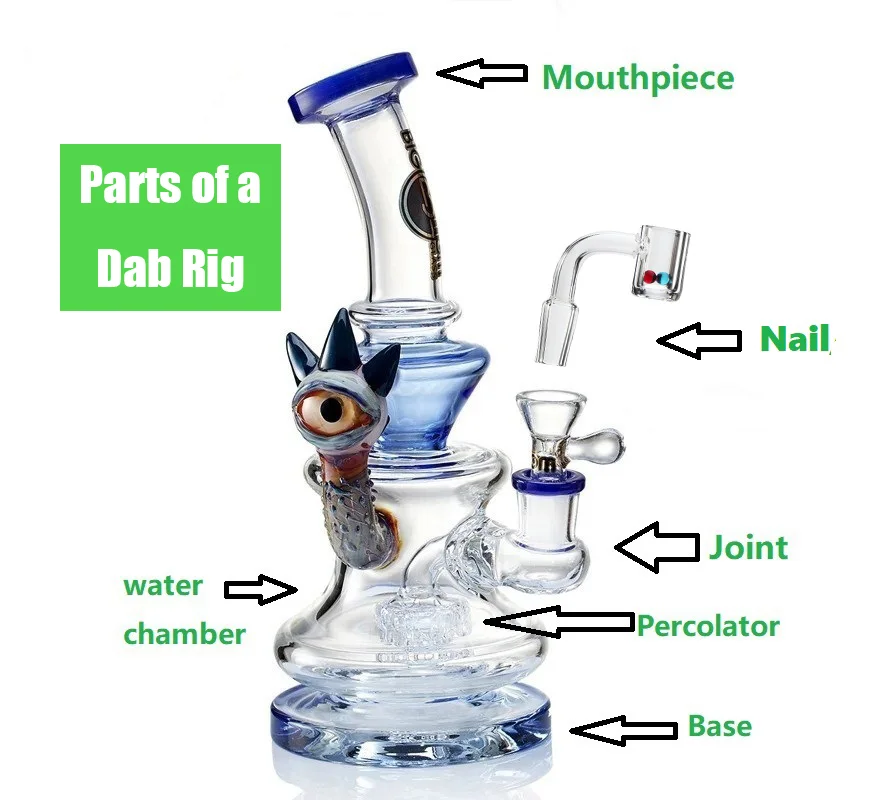
Dab rigs are made of various materials, but mainly glass and silicone.
Borosilicate glass is strong and temperature-resistant enough to withstand constant use.
Silicone is known to be non-stick, lightweight, portable and can withstand high temperatures and a beating without being damaged.
The pieces that make up a dab rig are the base, water chamber, mouthpiece, joint, nail/banger and carb cap.
Every rig comes with these pieces, but some contain different types of percolators and chambers to give you a unique experience.
Electric dab rigs use electricity to heat the nail for consistent temperature, offering convenience, precision, and digital temperature control.
Materials Needed to Clean Your Glass Dab Rig
Before you start any glass dab rigs cleaning, you'll need to make sure you've got all of the necessary supplies ready to go. This includes:
1. Isopropyl Alcohol (91-99%)
This potent solvent is the linchpin of the cleaning process. It dissolves and breaks down oils, residues, and impurities that accumulate in your rig.
You can also use a 420 glass cleaner instead.
2. Coarse salt or rock salt
Considered the scrubbing agent, coarse salt works in tandem with isopropyl alcohol to dislodge and remove tenacious buildup.
As you gently shake the mixture, the abrasive action of the salt aids in scrubbing away stubborn residues from hard-to-reach corners.
3. A large sealable plastic bag
The resealable bag should be large enough for the pieces to fit.
You may want different containers to separate the pieces to keep them from banging together and potentially breaking.
4. Rubber Plugs
They are used to hold the cleaning solution securely inside the glass rig while cleaning.
Plugging the holes with cleaning rubber plugs or caps will be less messy and safer than using your fingers.
5. Pipe Cleaners and Q-tips
These slender tools are indispensable for accessing intricate parts of your rig that are challenging to clean otherwise.
Pipe cleaners are adept at navigating through the twists and turns of the downstem, while Q-tips offer precision cleaning for the most delicate components.
6. Warm water
Warm water rinses away loosened residues and cleaning solutions, leaving your rig fresh and residue-free.
It's crucial to use the appropriate water temperature to avoid thermal shock that could damage your glass rig.
How to Clean a Glass Dab Rig? Step by Step Guide
After you gather your materials, complete the following steps to clean your glass dab rig.
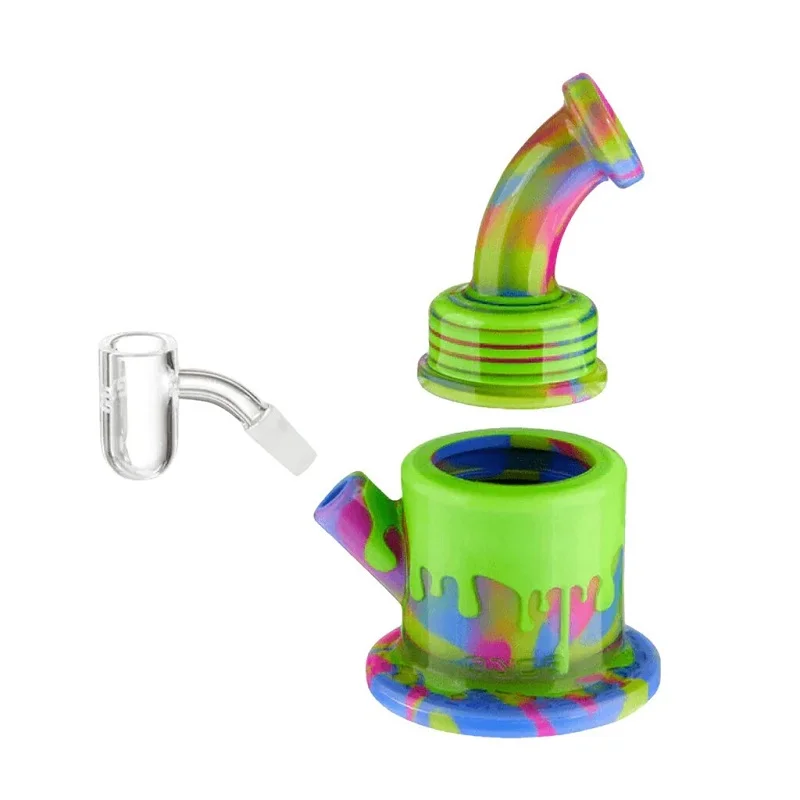
Step 1: Disassemble Your Rig
Carefully disassembling your dab rig. Remove the nail/banger, and any other detachable parts from your device.
If you clean your dab rig while all the accessories are still attached, you may end up damaging or breaking it.
Step 2: Pour and Cover
Empty the dirty water from your dab rig, getting as much out as possible.
Rinse it with warm water. This will help to remove any loose residue and make what remains easier to remove, making the cleaning process more effective.
Step 3: Add Coarse Salt and Alcohol
Pour a mix of 91% isopropyl alcohol and some coarse salt into the water chamber of your dab rig.
The alcohol helps to break down resin, and the salt creates friction that pulls any remnants away from the glass surface.
if your dab rig is very mini or small, You can also put the dab rig in a zip-lock plastic bag with the cleaning solution.
Step 4: Shake the Device
Cover any openings with your hands or rubber plugs, then shake vigorously, ensuring the salt/alcohol mixture is thoroughly coating and working its way through your rig. This helps to get the process started and loosens up any sort of big buildups.
Step 5: Soak the device
It is time to soak! Allow the rig to soak in the cleaning solution for at least 30 minutes. This will give the alcohol and salt enough time to break down the resin and grime.
If the water chamber is very dirty, Let your dab rig sit for at least half an hour or more with the cleaning solution in it.
Step 6: Clean the smaller parts
Don’t forget your banger and other removable parts. Please put them in a resealable ziplock bag or a plastic container and add the same alcohol salt cleaning solution.
Shake vigorously and then Let it soak to dislodge the buildup. Use Q-tips or pipe cleaners to scrub off any stubborn buildup.
Step 7: Rinse Thoroughly
After you give your dab rig and components a good soaking, it's time to give them a thorough rinse.
Rinse your items with warm water for several minutes to ensure that any residual cleaning solution is rinsed off.
Step 8 (optional): Clean the Tricky Spots
Inspect your rig and nail/banger following the rinse, and see that all buildup has been removed, especially for tight spots or hard-to-reach areas.
If there are still any residue, use the cleaning brush or pipe cleaner to scrub each rig component thoroughly. This helps ensure every nook and cranny is clean.
Step 9: Dry and reassemble
Shake out excess water and let all the components air dry completely. You can also use a lint-free cloth to speed up the drying process.
Once dry, reassemble your dab rig, making sure all the pieces fit snugly together.
How to clean a silicone dab rig?
Soak a silicone dab rig in rubbing alcohol for long time can cause the silicone to erode and dmage.
Instead of using alcohol for soaking and cleaning, a mixture of warm Dish soap or soapy water can make for an effective cleaning solution.
In addition, you can place the silicone dab rig in the freezer overnight. This causes the reclaim to fully solidify, and makes it easy to crack off.
How to clean an electric dab rig?
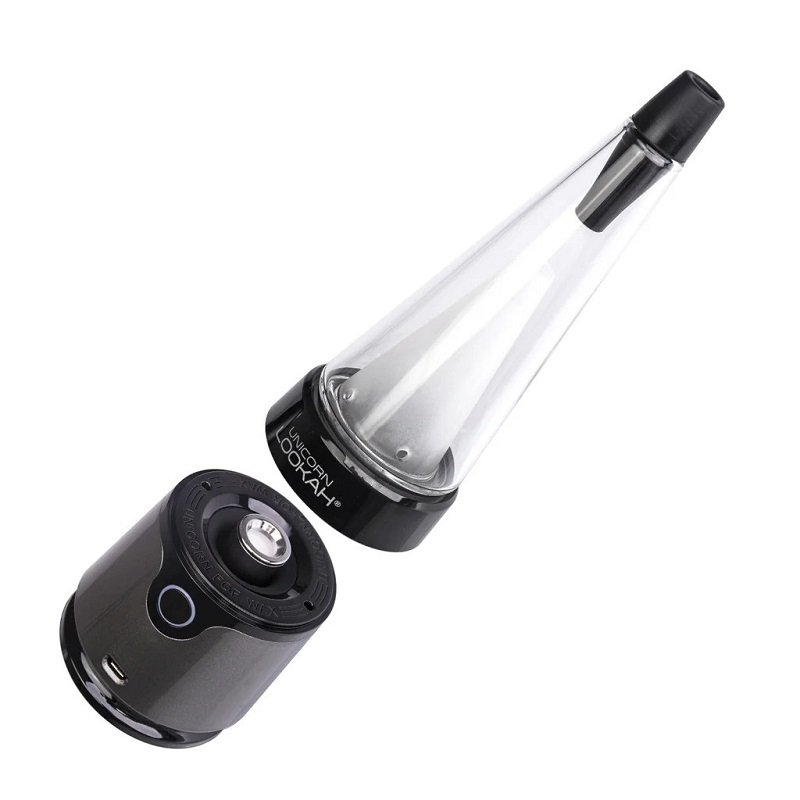
Start with disassemble your E-Rig. This typically involves removing your atomizer/coil and glass bubbler from the base of the unit.
Place the quartz or ceramic atomizer/coil in the iso alcohol solution for a while. After that, Rinse your coil with warm water. Let it dry completely before assembly.
If needed, soak and clean the glass bubbler and other metal removable parts with alcohol or a specialized cleaning solution.
Don't soak the silicone or plastic parts in rubbing alcohol, you can simply use a warm dish soap or soapy water solution instead.
How Often Should You Clean Your Dab Rig?
Aside from changing the water of device, serious consumers should also clean the dab rig with alcohol every 5-7 days to reduce resin buildup, depending on your usage.
The Nail or banger should be cleaned at least once after each use by using a q-tip dipped in iso alcohol, because tar accumulate quickly, which will affect the overall flavor and performance of your dab rig.
Conclusion
Now that you know how to clean a dab rig, you can ensure that yours stays as clean as the first time you bought it.
If you followed these steps and your glass dab rig still doesn't look as nice as you'd like, try repeating the steps again and increasing time durations and shaking intensity.
Cleaning dab rigs might seem like a tedious chore, but with the right tools and techniques, it becomes a straightforward process.
Regularly cleaning and maintaining your dab rig ensures a clean, flavorful dabbing experience every time. Keep do it!